We made this super cute process art canvas to celebrate big brother graduating from Preschool. It will be cherished for years to come!
What you need:
- small canvas (we used 7" x 14")
- photo of your child
- white card
- small canvas (we used 7" x 14")
- photo of your child
- white card
- acrylic paints (we used blue, green, gold and silver)
- plastic wrap
- salad spinner (we got ours from IKEA)
- silver paint pen
- letter stickers
- strong craft adhesive (we used E6000)
- tape
- scissors
- plastic wrap
- salad spinner (we got ours from IKEA)
- silver paint pen
- letter stickers
- strong craft adhesive (we used E6000)
- tape
- scissors
 |
| Some of our materials ready to go. |
How it works:
I really wanted to enjoy some time with my little man celebrating his completion of Preschool. I thought it would be nice to work with him on creating a keepsake canvas. This particular project was very special, and such a fun way to spend some time bonding over together art.
The first thing we did was to take a photo of my little man posing as if he was holding a balloon. I printed off the photo and cut it out. We then made the summery landscape background on the canvas. To do this we used two tones of blue and two tones of green acrylic paint. My son squirted the paint over the canvas (avoiding creating huge blobs of paint), and I then wrapped it in plastic wrap.
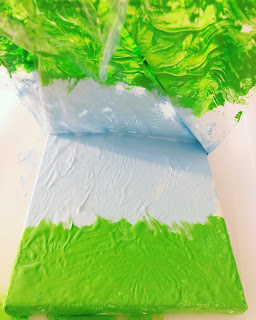
The next part involved my son using his hands to squish the paint all over the canvas. We love using plastic wrap process painting as it creates a great texture with the added bonus of being mess free!
After the paint had been spread all over the canvas, I carefully peeled off the wrap and set it aside to dry overnight. If you have any areas without paint you can always use a cotton ball or wrap your finger in plastic wrap to subtly add a little more. We also used a sponge style brush to add paint around the sides of the canvas so that there was no white left showing.
The next stage of the project was definitely my son's favourite. I cut out a balloon shape from the white card and taped it to the bottom of the salad spinner. He chose to use gold and silver paint which turned out really cool. He added blobs of paint to the card and then spun to his heart's content!
The end effect is so neat from the spin art. You can keep adding more blobs to create a layered effect and avoid too much white showing on the balloon.
Once all parts of the project are completely dry you can put it together and add the finishing touches. We stuck down the picture of my son, then stuck down the balloon at the top of the canvas, and used a silver paint pen to draw the 'string' from my son's hand to the balloon. The final touch was to use the letter stickers to spell out 'Class of 2018' on his balloon.
This turned out really cute, but more importantly we had a blast making it together! Two different forms of process art and a beautiful snapshot in time of my son as he gets ready to move onto the next adventure in life.
This is certainly a project that will be cherished for years to come, along with our happy together art memories.
The first thing we did was to take a photo of my little man posing as if he was holding a balloon. I printed off the photo and cut it out. We then made the summery landscape background on the canvas. To do this we used two tones of blue and two tones of green acrylic paint. My son squirted the paint over the canvas (avoiding creating huge blobs of paint), and I then wrapped it in plastic wrap.
 |
| Paint on canvas and being wrapped. |
 |
| Squishing the paint to cover the canvas. |
 |
| Peeling off the plastic wrap. |
 |
| Adding paint to the card balloon. |
 |
| The final balloon. |
 |
| The final keepsake canvas. |
 |
| Very proud of his artwork. |
 |
| Baby sis insisted on a picture too! |

No comments :
Post a Comment